Printing Q&A: Can you print to the edge of the page?
Posted in Printing Tips and Tricks on 06 February 2014
Printing to the edge of the page eh? We get asked about this a lot. If you mean you would like your documents to have a colour or image going right up to the edge of the page with no ugly and annoying white margin then the simple answer is yes, of course!
In order to achieve this, when providing us your document we need it to have what are called ‘bleed‘ and ‘crop marks‘.
What on earth are Bleed and Crop Marks?

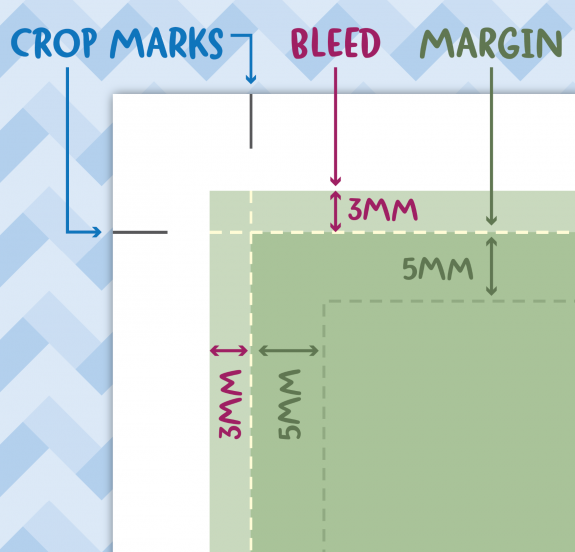
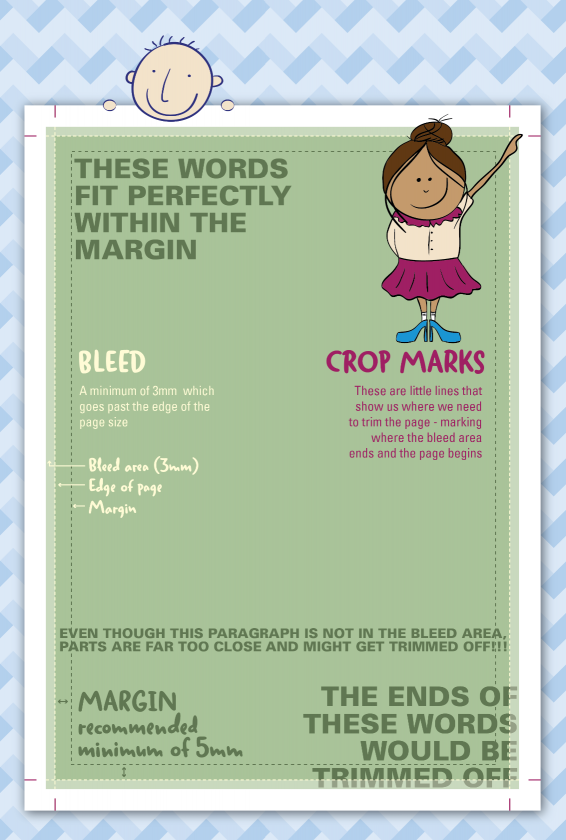
OK, so bleed is an area of the artwork that is extended beyond the actual dimensions of the document. By having artwork that exceeds this area it means once printed we are able to trim off the unwanted edges. The recommended amount of bleed to have is 3mm which is marked out with two crop marks in each corner.
So if your document is A4 which is 210mm x 297mm you need to allow 3mm all the way around, making the size of your page 216mm x 303mm.
But how do you know where to trim the page?
Thats where the crop marks come in. These are little lines that show us where we need to trim the page. It marks where the content ends and the bleed area begins.
So that means I can have content right up to the edge of my page?
While the guillotines we use are the latest in super accurate technology and our Doxtors in charge of them are even more so (of course), it is always best to leave a good margin for anything important on the page, like a logo, text or a vital part of the image. This ensures that it won’t end up being uncomfortably close to the edge, or even cut off. As a guide, 5mm would be a good minimum margin. Many people have a much larger margin – perhaps 10mm or more on an A4 page. It really depends on the size of the document and the way you would like it to look once it has been cut down to its finished size.
That’s all very well, but how do I set up bleed and crop marks?
This depends on what software you are using. If you are using a program such as Adobe Indesign, Illustrator or Photoshop this is simple enough. Use the bleed and margin settings to help you set up the document. Then when you come to create a PDF, ensure your export settings include bleed and crops. With other programs such as Word or PowerPoint, this may be a more manual process. However there are plenty of resources on-line to help you through this step by step.
